
Experiencing back pain can be a frustrating setback that affects your performance on the waves. It’s common among surfers and can result from repetitive movements, muscle imbalances, or a previous injury.
However, it’s just as essential to address and manage back pain to prevent further injuries or avoid them in the first place. One way to do this is by incorporating exercises into your routine that can help strengthen and stretch the muscles in your back.
Before we get to the exercises, if you suspect you may have a back injury or just want to know more about it, we did a separate article recently on causes and treatment of back injuries in surfing.
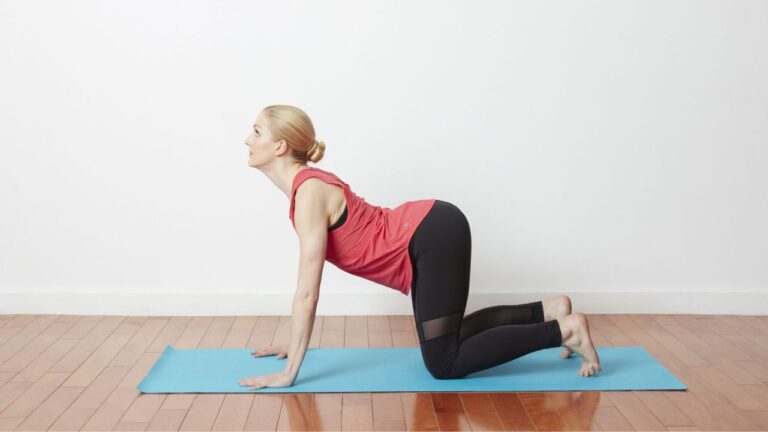
1. Cat-cow Stretch
The Cat-cow stretch can be done for a few minutes, 2-3 times a day, or as part of your warm-up routine before surfing. You can do it for 5-10 reps at a time.
How to do it properly:
- Start on your hands and knees with wrists directly under your shoulders and knees under your hips.
- Inhale and lift your chest towards the ceiling, allowing your belly to drop towards the floor and arching your back. This is the “Cow” position.
- As you exhale, tuck your chin to your chest and round your spine, bringing your belly button towards your spine. This is the “Cat” position.
- Continue moving between the two positions.
Tip: Focus on slow, controlled movements and keep your core engaged throughout the exercise.
Precautions: If you have any neck or back injuries or pain, it’s important to consult with a healthcare professional before doing this exercise. Also, avoid over-arching your lower back, which can aggravate existing lower back issues.
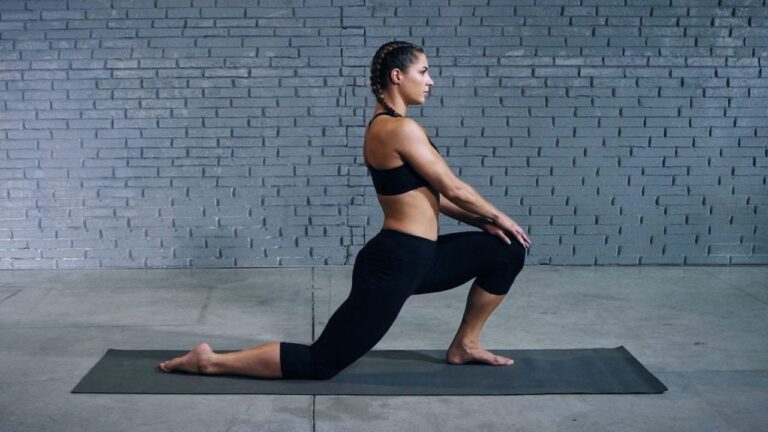
2. Hip Flexor Stretch
To reap the benefits of hip flexor stretch, it’s essential to perform it regularly. You should do this stretch at least 3 to 4 times per week. Start with 2 to 3 sets of 30-second holds.
How to do it properly:
- Start in a lunge position with your left foot forward and your right leg behind you.
- Keep your left knee bent at a 90-degree angle and your right leg straight. Place your hands on your left knee for support.
- Slowly shift your weight forward until you feel a stretch in the front of your right hip.
- Hold this stretch for 30 seconds and then switch sides and repeat.
Tips: To maximize the benefits, engage your glutes and core muscles while holding the stretch. You can also increase the stretch by leaning forward slightly or lifting your arms overhead.
Precautions: Be careful not to overstretch or strain your lower back by arching too far back. If you have any pre-existing hip or lower back injuries, consult your healthcare provider before adding this stretch to your routine.
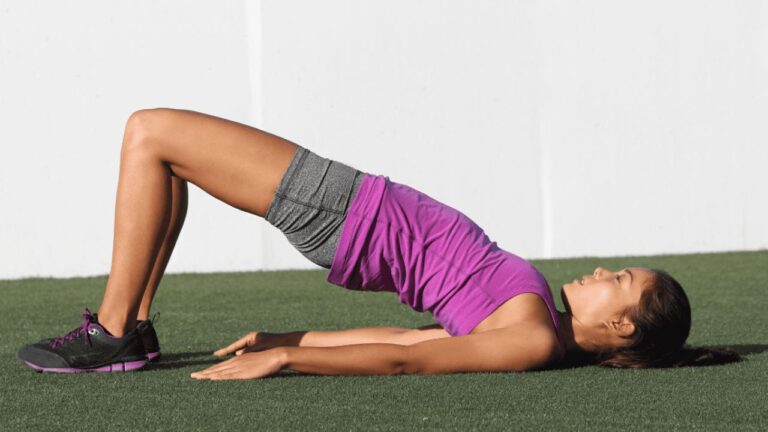
3. Glute Bridge
Aim to perform this exercise for 2-3 sets of 10-15 repetitions, 2-3 times a week.
How to do it properly:
- Lie on your back with your knees bent and feet flat on the ground, hip-width apart.
- Place your hands on the ground beside you, palms down.
- Press your feet into the ground and lift your hips towards the ceiling.
- Hold for a few seconds at the top, then slowly lower your hips to the starting position.
Tips: Keep your core engaged throughout the exercise to protect your lower back. Squeeze your glutes at the top of the movement to activate them fully.
Precautions: If you have any lower back issues or injuries, it’s important to be cautious. Start with a smaller range of motion.
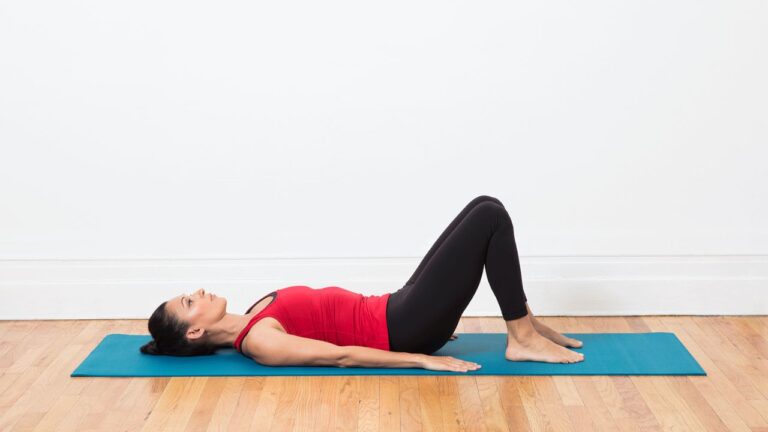
4. Pelvic Tilt
Start by performing 1-2 sets of 10-15 repetitions and gradually increase the number of repetitions and sets. You can do this exercise daily, but rest your muscles for at least one day per week.
How to do it properly:
- Lie down with your knees bent and feet flat on the ground.
- Slowly tilt your pelvis upwards by tightening your lower abdominal muscles and glutes.
- Hold this position for 5-10 seconds, then slowly release and lower your pelvis to the ground.
Tips: Focus on engaging your lower abs and glutes to perform the movement correctly. If this exercise is too difficult, you can start by tilting your pelvis up only a few inches until you build strength.
Precautions: Avoid arching your back too much or lifting your hips too high, as this can cause strain on your lower back.
5. Dead Bug

Start with 2-3 sets of 10-12 repetitions, and gradually increase the frequency as your core strength improves. Performing this exercise at least 2-3 times weekly is recommended for optimal benefits.
How to do it properly:
- Lie flat on your back with your arms extended straight up towards the ceiling and your legs in a tabletop position (knees bent at a 90-degree angle).
- Inhale and draw your belly button towards your spine, pressing your lower back flat against the floor.
- Slowly lower your right arm and left leg towards the floor, keeping them a few inches off the ground. Keep your core engaged and your lower back pressed flat against the floor.
- Exhale and return your arm and leg to the starting position.
- Repeat on the other side, lowering your left arm and right leg towards the floor.
Tips: Keep your movements slow and controlled, focusing on maintaining proper form rather than speed.
Precautions: Warm up properly before starting. This can help prevent injury and prepare your muscles for the workout.
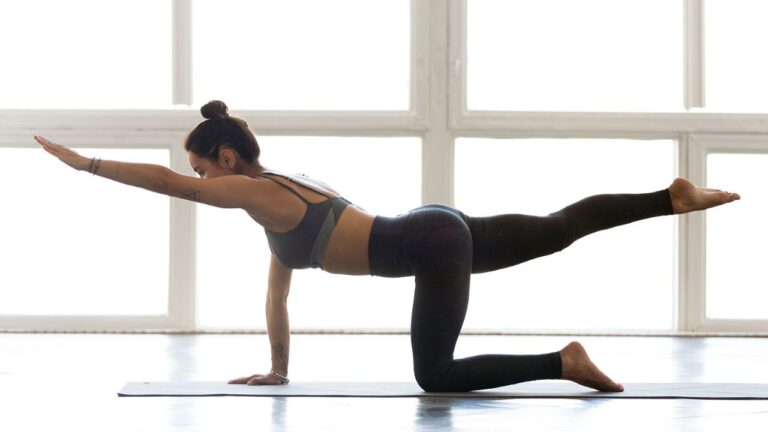
6. Bird Dog
Start with 1 set of 10-12 repetitions on each side and work up to 2-3 sets of 10-12 reps. Do this exercise at least 2-3 times a week.
How to do it properly:
- Put your hands and knees in a tabletop position, with your wrists under your shoulders and your knees under your hips.
- Engage your core muscles by drawing your belly button towards your spine. Lift your right arm straight in front of you, and at the same time, lift your left leg straight behind you, keeping both your arm and leg parallel to the floor.
- Hold this position for a few seconds, then return to the starting position. Repeat the same movement with your left arm and right leg. That’s one repetition.
Tips: Keep your head in line with your spine and look down at the ground.
Precautions: If you have back or neck injuries or feel pain or discomfort during this exercise, stop immediately and consult a doctor or a physical therapist.
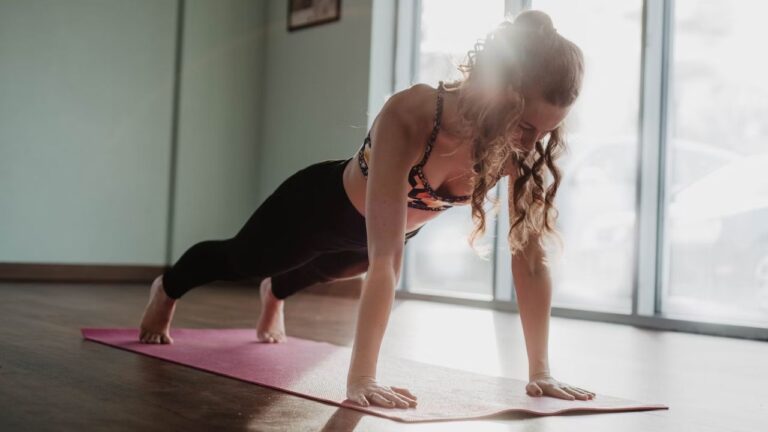
7. Plank
Start by holding the plank position for 10-15 seconds and gradually increase the duration to up to one minute or more. Aim for 2-3 sets with a 30-second rest between each set. You can do this exercise 3-4 times a week.
How to do it properly: Begin with a push-up position, with your palms and toes on the ground and your body forming a straight line. Keep your arms straight, and your elbows should be aligned with your shoulders.
Tips: Make sure your body remains in a straight line throughout the exercise. Avoid arching your back or sagging your hips toward the ground. Keep your neck aligned with your spine by looking at the floor.
Precautions: Avoiding this exercise is best if you have any wrist or shoulder injuries.
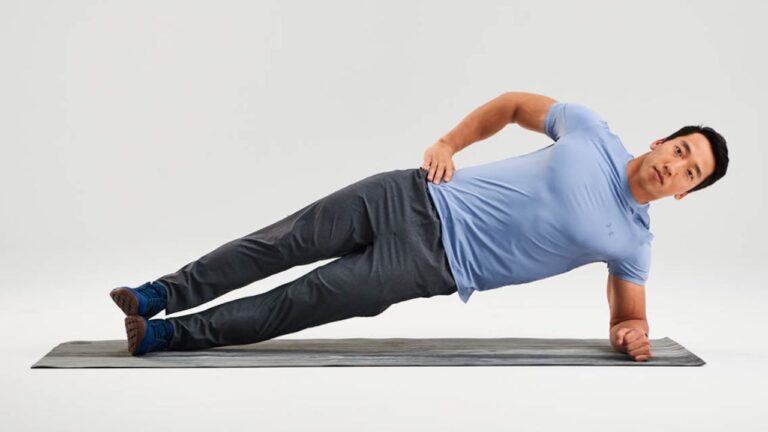
8. Side Plank
Hold the side plank for 20-30 seconds per side, and work up to 60 seconds or more. Aim to do 2-3 sets per workout, 2-3 times weekly.
How to do it properly: Start by lying on your side with your forearm flat on the ground, your elbow under your shoulder, and your legs stacked on each other.
Lift your hips off the ground, forming a straight line from your head to your feet.
Tips: If the exercise is too challenging, do a modified side plank on your knees instead of your feet.
Precautions: Avoid this exercise if you have any shoulder or wrist injuries that could be aggravated by supporting your weight on your arm.
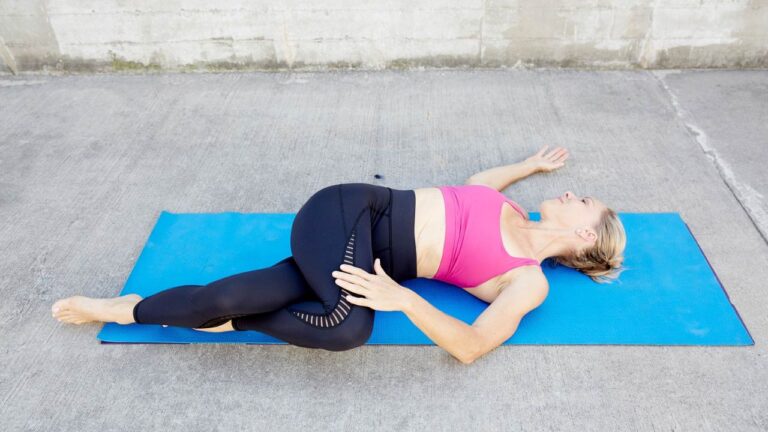
9. Reclining Spinal Twist
Hold the pose for 30 seconds to 1 minute on each side, and repeat 2-3 times. You can practice this pose daily or as needed.
How to do it properly:
- Lie on your back with your arms out to the sides, palms facing down.
- Bend your knees and bring them toward your chest.
- Exhale and lower your knees to the right side of your body, keeping your shoulders on the ground.
- Gently turn your head to the left and hold the pose.
- Inhale, bring your knees back to the center and repeat on the other side.
Tips: If you find keeping your shoulders on the ground difficult, try placing a pillow or blanket under them for support.
Precautions: If you have lower back or hip injuries, avoid this pose or modify it by bending your knees more.
10. Wall Angels

Start with 1-2 sets of 10-15 repetitions and gradually increase the number of sets and repetitions. This exercise can be done 2-3 times a week.
How to do it properly:
- Stand with your back against a wall, with your feet shoulder-width apart.
- Bend your elbows and raise your arms to shoulder height, with your forearms perpendicular to the wall.
- Slowly slide your arms up the wall, keeping your elbows and wrists in contact. Stop when your arms are fully extended overhead.
- Hold briefly, then slowly lower your arms to shoulder height.
Tips: Keep your head, back, and buttocks in contact with the wall throughout the exercise.
Precautions: Avoid this exercise if you have shoulder or neck injuries or pain. If you experience any discomfort during the exercise, stop immediately and consult a healthcare professional.
11. Cobra Stretch

It’s best to start with two sets of 10 reps, gradually increasing the number of repetitions and the duration of each hold over time. You can perform this exercise daily, but make sure to take breaks in between sets.
How to do it properly: Lie down on your stomach with your hands at your sides, palms down. Slowly raise your upper body, using your arms to support your weight, until your chest is off the ground. Hold the position for 10-15 seconds and then release, lowering your body back to the starting position.
Tips: Focus on using your back muscles to lift your chest, not your arms. You can place a small pillow or towel under your hips for extra support.
Precautions: Avoid this exercise if you have spinal injuries or conditions affecting your ability to bend your back, such as herniated discs or spinal stenosis.
12. Child’s Pose
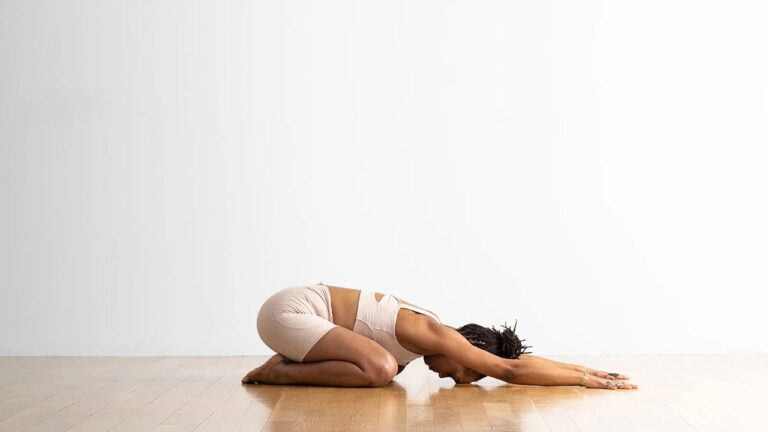
Start by holding the pose for 30 seconds and then gradually increase the duration to up to 5 minutes. It’s recommended to perform this pose once a day, ideally after a surfing session.
How to do it properly: Start on your hands and knees, with your wrists aligned under your shoulders and your knees under your hips. Gently lower your hips back onto your heels while keeping your arms straight before you. Rest your forehead on the floor or a yoga block, and take deep breaths in and out through your nose.
Tips: You can modify the pose by keeping your knees closer together for a more restorative variation or by widening your knees and stretching your arms forward for a more active variation.
Precautions: If you have knee or ankle injuries, you may need to modify the pose by placing a pillow or folded blanket under your knees.
13. Knee-to-Chest Stretch

You can perform this exercise for 10-15 minutes daily, depending on your comfort level.
How to do it properly: Start lying on your back with your legs straight. Bring one knee to your chest, clasping your hands around your shin, and hold for 20-30 seconds. Release and repeat with the other leg.
Tips: Keep your back flat on the ground while bringing your knee towards your chest.
Precautions: If you have a knee injury, avoid this exercise.
14. Standing Hamstring Stretch
The standing hamstring stretch can be done daily for 2-3 sets of 15-30 seconds on each leg.
How to do it properly:
- Stand with your feet hip-width apart to perform a standing hamstring stretch and place your hands on your hips.
- Step forward with your right foot and flex your right foot, keeping your toes pointing upward.
- Then, slowly hinge forward at the hips, keeping your back straight until you feel a stretch in the back of your right leg.
- Hold this position for 15-30 seconds and then release. Repeat on the other leg.
Tips: Keep your back straight and not rounded as you hinge forward. You can also use a chair or a wall for support to maintain balance.
Precautions: Avoid this stretch if you have a hamstring injury or strain.
15. Foam Rolling
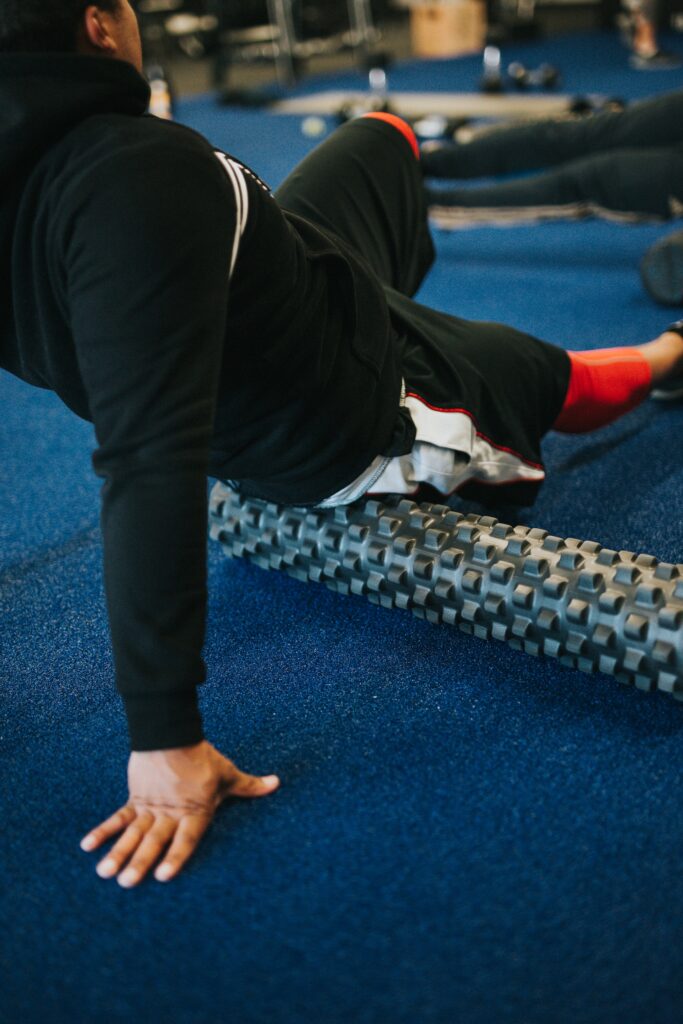
Foam rolling can be done for 10-15 minutes at a time, 2-3 times per week. You can adjust the frequency and duration based on your needs and preferences.
How to do it properly:
- To foam roll your back, lie on the roller horizontally along your spine. Bend your knees and keep your feet flat on the ground.
- Use your feet to push yourself up and down along the roller, focusing on areas of tension or soreness.
- You can also foam roll your hips, legs, and other body parts by positioning the foam roller beneath you and using your body weight to apply pressure.
Tips: It’s important to move slowly and focus on areas of tension. Stay hydrated.
Precautions: It’s important to listen to your body and not push yourself too hard. If you experience sharp or intense pain, stop immediately and consult with a medical professional.
Expert QnA
Q. Can exercises really help with back pain for surfers?
Exercises can effectively manage and prevent back pain for surfers. Strengthening the core muscles, improving flexibility, and incorporating back-specific exercises can all help to alleviate pain and prevent further injury.
Q. How often should I do these exercises?
Doing these exercises at least 2-3 times per week is recommended. Consistency is key for seeing improvement and preventing future pain or injury.
Q. Should I consult with a doctor before starting exercises?
If you have chronic or severe back pain, it’s recommended to consult with a doctor or physical therapist before starting any exercise program. They can evaluate your specific situation and provide guidance on safer and effective exercises.
Q. Can these exercises be done at home, or do I need a gym membership?
Back exercises can easily be done at home with minimal equipment, such as a yoga mat or resistance bands. However, some exercises may be more easily done with access to gym equipment such as a cable machine or weights.
Q. How long does it take to see results from back exercises?
It can vary depending on the severity of the pain and how consistent you are with the exercises. Generally, improvement can be seen within a few weeks of consistent practice. It’s important to remember that progress may not be linear, and there may be setbacks along the way.
That said, sticking with the exercises can lead to long-term improvement.